Review of Flashforge’s new Adventurer 4 3D Printer

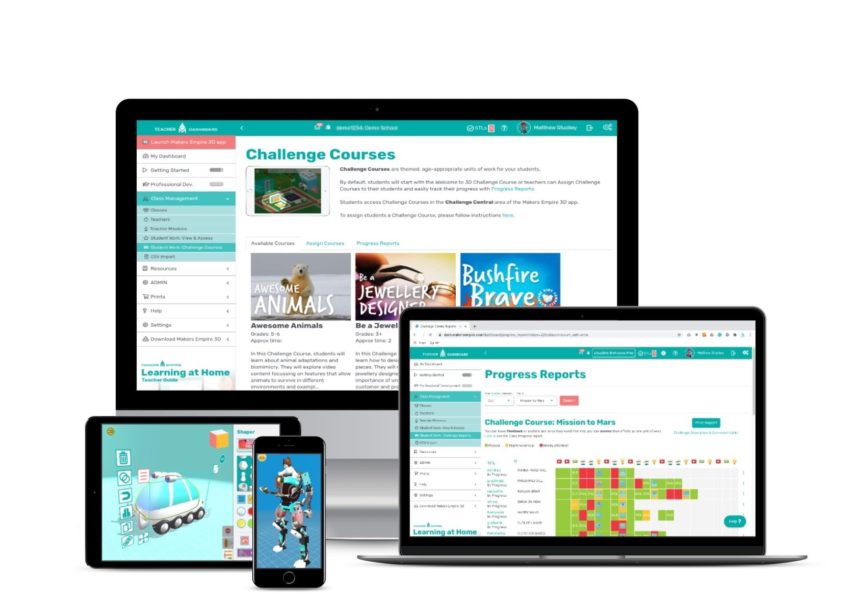
Makers Empire makes the world’s most fun and easy to use 3D design app and 3D learning program for primary, elementary and middle school children. Students can show off their 3D designs by embedding them into their digital or print presentations or they can download their designs to print them with a 3D printer. 

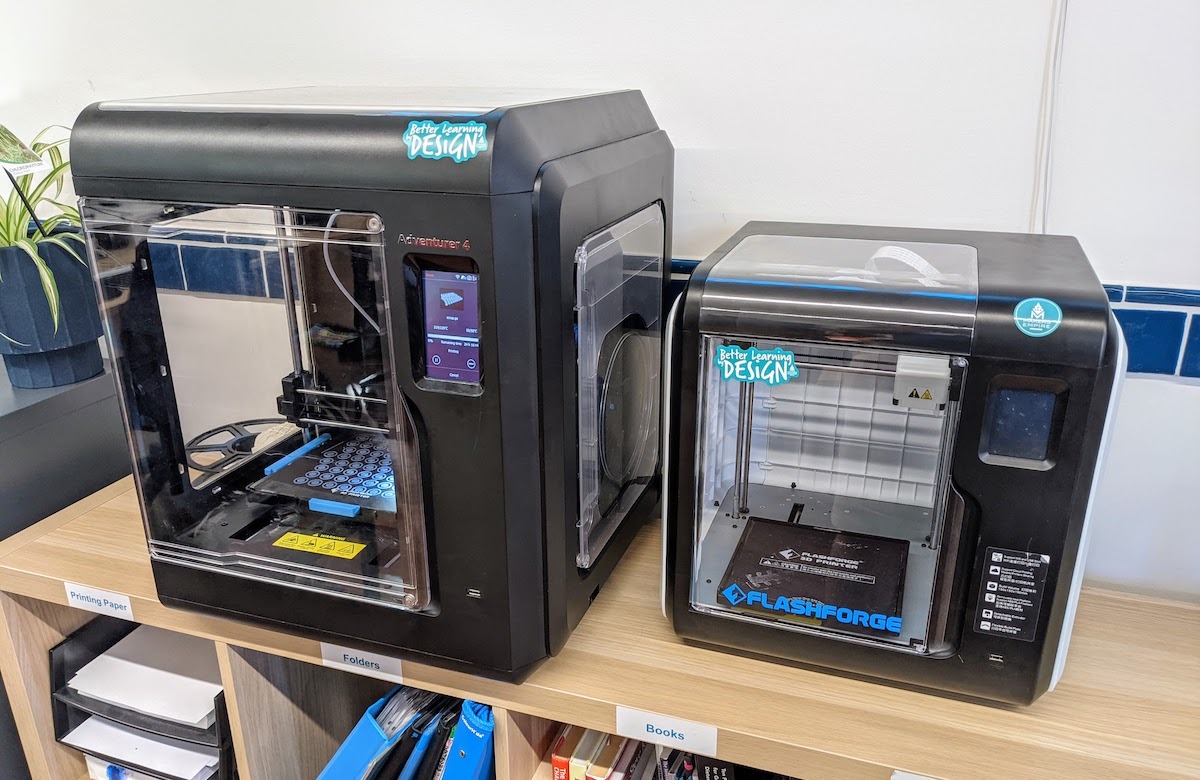
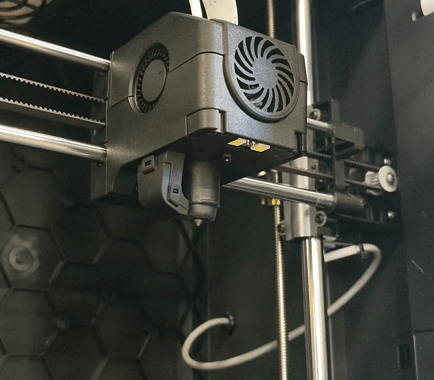
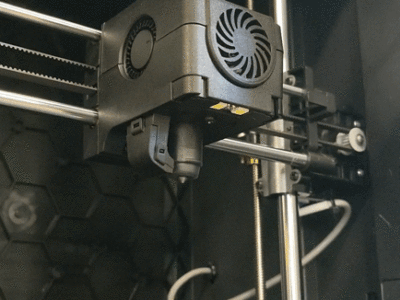
So we love testing new 3D printers for primary, elementary and middle schools and recommending the best 3D printers in Australia and the best 3D printers in America to our school customers. So for the past eight weeks, we’ve been happily testing and evaluating the new Adventurer 4 3D printers from Flashforge. The classic and reliable Flashforge Inventor IIS 3D printer was discontinued late last year so we’ve been looking forward to the new offering from Flashforge. 

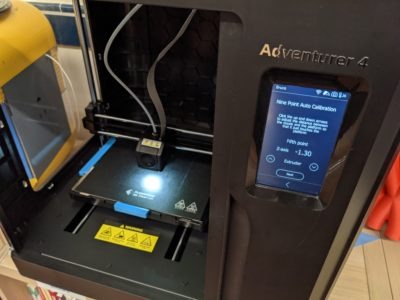
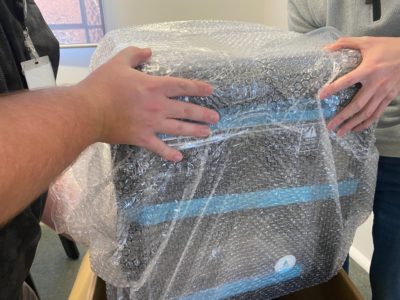
Luckily, Makers Empire received one of 40 pre-production Adventurer 4 models made by Flashforge for the purposes of testing and evaluation. As the printer we received was hand-built for testing purposes, please note that what we found with the test model may be improved or changed in the final version that is shipped to customers.

Choosing a 3D printer for your primary or middle school can be a difficult decision. While many will be great for high school students or a hobbyist, some are less suited for regular use in a primary or middle school classroom, makerspace or library. So we make sure to test all our 3D printers thoroughly. 

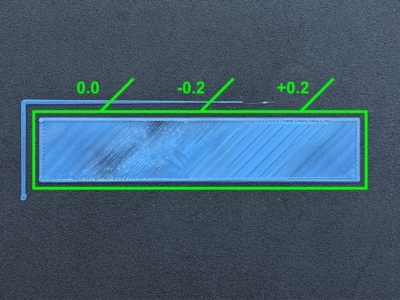
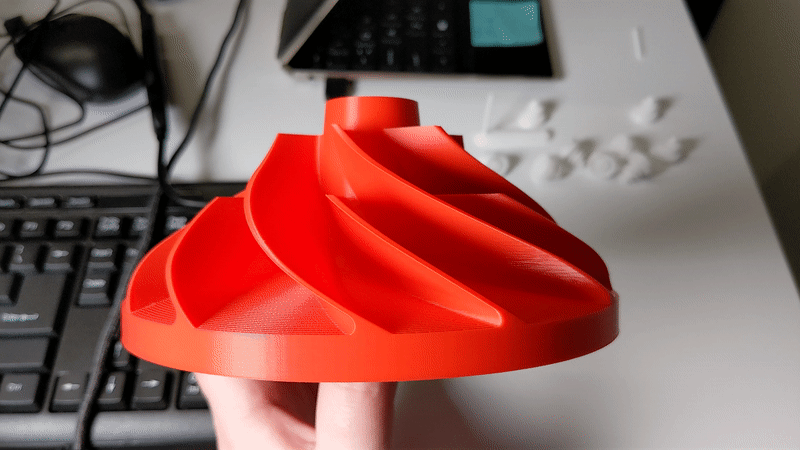
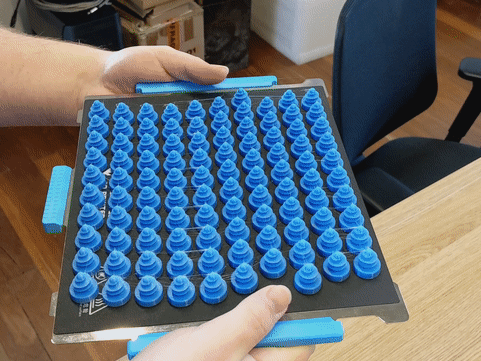
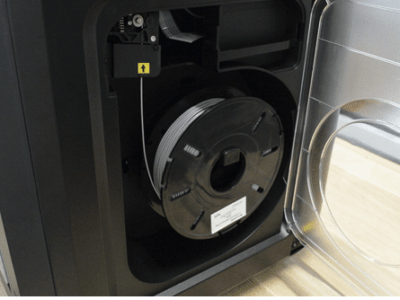
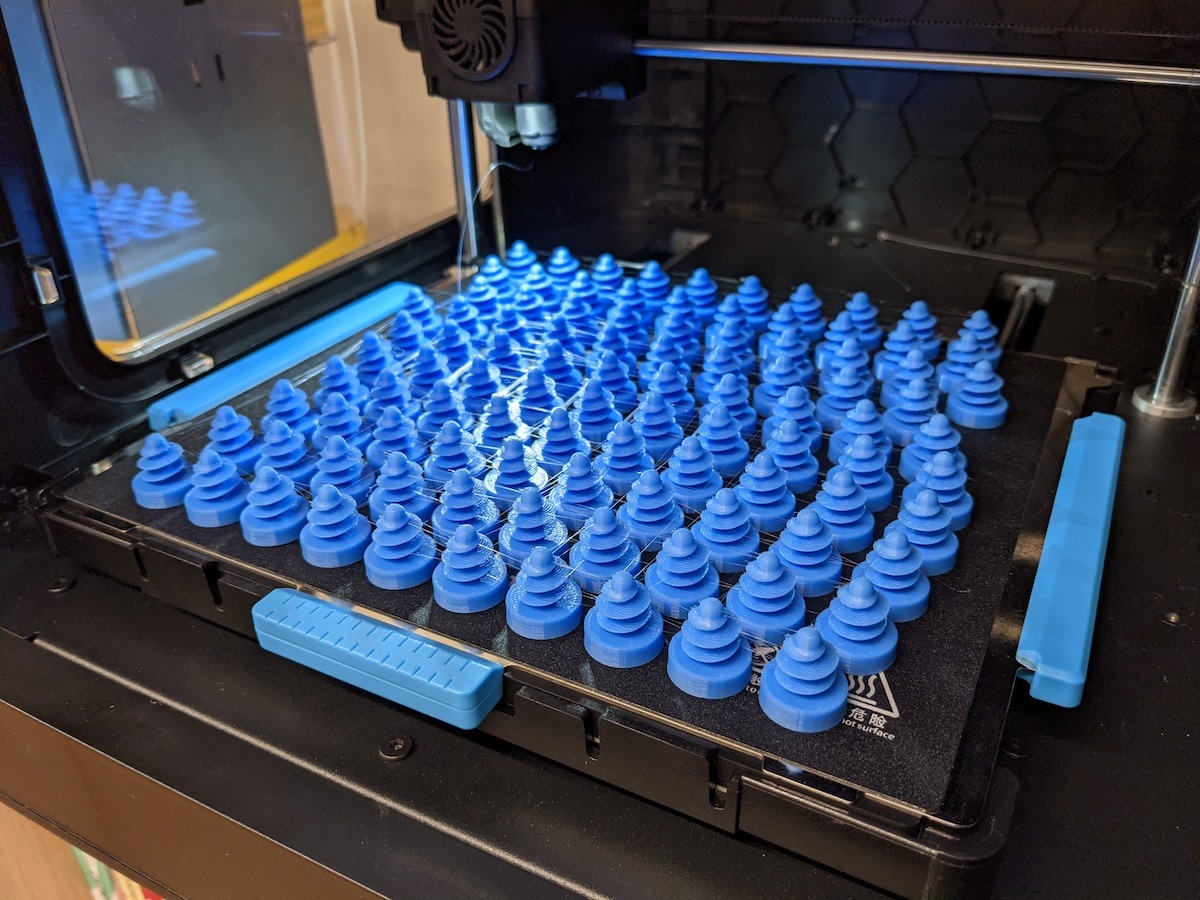
So far, we have completed 800 printing hours with this printer, which would equate to a few years of average use at a regular-sized primary school. So we know how this test printer performs over time and if this is a printer we would recommend to primary and middle schools. 

Testing the Flashforge Adventurer 4 3D Printer

Statistics

  • Printer Type: FDM (Fused Deposition Modeling, also known as Fused Filament Fabrication)
  • Build Area: 220 x 200 x 250mm (HxDxW)
  • Nozzle width: 0.4mm (0.3mm and 0.6mm are available)
  • Maximum Resolution: 0.08mm layer height
  • X/Y Precision: X/Y axis:0.011mmï¼›Z axis:0.0025mm
  • Weight: 25kg
  • Materials: PLA, ABS, PC, PETG and more. 

First Impressions

The Adventurer 4 serves two purposes for Flashforge: to replace the discontinued Inventor IIS 3D printer  and improve on the already great and currently available Adventurer 3 printer. 

Visually, the Adventurer 4 printer (below left) looks very similar to the Adventurer 3 (below, right), so we were pretty shocked to see just how much bigger the Adventurer 4 actually is.

Having moved past this shock, we started setting up the printer, which is where we found a lot of the new improvements Flashforge has made. We noticed two solid rods for the Y axis, as opposed to the single rod/idler wheel combo on the Adventurer 3, which makes for a much more rigid printer that delivers more consistent prints. The screen was bigger and far more responsive, and the entire printer just felt more refined and complete.

Notable Features

Clip-In, Clip-Out Nozzle

One of the cool features of the Adventurer 4 is the clip-in, clip-out nozzle assembly. Borrowed from the Adventurer 3, it’s possible to get different sized nozzles in order to get better printer results or faster prints. If you ever want to swap the nozzle you need to simply unload the filament, squeeze two tabs together and the nozzle will pop out. Slide a new one in, and it’ll click into place.

Flashforge Adventurer 4 printer

Built-In Instructions

A lot of the notable features of the Adventurer are in the 3D printer’s built-in software: the Adventurer 4 has really nice instructions built into the machine. You can access them anytime, and they explain the process of troubleshooting basic issues like clogged nozzles, bad calibration and more. Having instructions built into the printer is something we’ve seen on The Cubicon and Sindoh printers and for new users, it’s incredibly helpful. 

Automatic Time Lapse Mode

The Adventurer 4 automatically creates time-lapse videos of each print if you ask it to. You can view them on the touchscreen, or with a USB stick plugged in, you can export them for viewing elsewhere. They are not fantastic, but it’s a really charming little reminder of the prints you’ve previously done.

<< Click on the image for high-speed time-lapse >>

Ability to Adjust the Nozzle Height When Printing

One of my personal favorite features is the ability to adjust your Z axis nozzle height on-the-fly while printing the first layer. If the first layer looks a little too far away or a little too close, you can simply adjust your Z value in the menu and the printer will follow. This feature is useful for more experienced users who understand what a good first layer looks like.

Assisted Mesh Levelling

Something that Flashforge printers have stuck with in the past is mechanical assisted levelling: this is when a switch will pop down from the extruder so you can then level the bed by turning the thumbscrews. With the Adventurer 4, we see the first implementation of assisted mesh levelling. This means that the printer walks you through creating a digital map of how flat the platform is using nine different points on the bed. I found the process really quick and very intuitive.

Print Results

Print results from the Adventurer 4 are fantastic. Because the base of the printer is a single-cast, CNC machined piece of alloy, the printing structure is incredibly rigid. The prints made using this printer consistently display silky smooth layers, coupled with highly accurate layer consistency. Click on the images below for the full-size images.

A couple of things we did notice while printing were some bed adhesion issues, and ‘stringing,’ where the filament leaves little thin strings across your print. Stringing could be mostly remedied by an update to the retraction settings in Flashprint so we’ve suggested this to Flashforge. 

Bed adhesion was nearly impossible to begin with because the cooling fan defaults to ‘ALWAYS ON’ in Flashprint. By manually turning it off for the first few layers, we had no further issues. Flashprint firmware is continually updated so we would expect these issues to be rectified before this printer is shipped to customers.

Pros

  • Click-in, Click-out nozzle
  • Built-in HEPA & Carbon filter
  • Power outage recovery
  • Fantastic layer consistency
  • Easily removable/flexible bed
  • Reliable, simple mesh levelling
  • Automatic time lapse creation
  • Built-in ethernet port for easy connection

Cons

  • Stringing’ can still be an issue with some models.
  • The Bowden tube can sometimes get caught around the nozzle if you go to maximum height
  • Touchscreen could be a bit bigger

Verdict

The Adventurer 4 is proof to us that Flashforge listens to its customers. We didn’t rate the Adventurer 3 very well because of the buggy firmware, the underpowered power supply and also the fact that the bed couldn’t be levelled (if it wasn’t flat from the factory, you’d just have to deal with it). So we’re pleased to see that Flashforge has done its best to address these concerns with its new Adventurer 4 3D printer. 

We’ve been consistently impressed with the Adventurer 4’s prints thanks to the rigid construction of the printer chassis. The intuitive and much improved interface of the touchscreen is something we’ve been hoping for, too.

Flashforge’s Adventurer 4 3D printer is a well-priced and solid choice for primary, middle and high schools, small businesses, and enthusiastic hobbyists. In its price range (around $1,000), we have not yet found another 3D printer matching the Adventurer 4’s notable features, build volume, print results and reliability. 

Adventurer 4 3D Printer Help Articles

Browse our collection of Adventurer 4 Help Articles answering questions like:

How do I unbox the printer?

Here is a step-by-step unboxing article.

How do I remove a print?

Here is a detailed help article.

How do I change nozzles?

Here is a detailed help article.

4. How do I change the filament?

Here is a detailed help article.

Luke Tansell, Hardware Expert at Makers Empire

Luke Tansell, Hardware Expert at Makers Empire

Luke has a Bachelor’s of Industrial Design from the University of South Australia. When not working at Makers Empire he spends his free time volunteering at Makerspace Adelaide. He has been using 3D printing as an industrial design tool for many years. He enjoys sharing his 3D printing journey via the videos and articles he makes for Makers Empire. He believes 3D printing is a technology that will go far and unlock doors we never knew were there, and he is stoked to be at the forefront, doing what he loves.

Buy Now at the Makers Empire Shop

The Adventurer 4 (ME) printer is available to buy from Makers Empire for Australian customers. The special Makers Empire (ME) version of the Adventurer 4 3D printer comes with extras worth $128 on top of the regular Adventurer 4 printer package:

  • Extra (spare) build platform
  • Three extra nozzles. In addition to the standard nozzle installed on the printer, you will also receive 1 x standard high-temperature nozzle, 1 x 0.6mm nozzle + 1 x 0.3mm nozzle. The 0.6 nozzle can print larger things more quickly, and the 0.3mm nozzle can do more detailed prints.

Why Buy 3D Printers from Makers Empire?

Try Makers Empire for free!

Start learning 3D design in minutes. Make teaching design and technology fun and effective!