Our Cubicon Single was working OK for about a week and then it stopped.
The printer does an 8 step auto-bed level before every print, this means the bed is motorized, which is great!
However, for this to work the bed must be within certain tolerances and I guess ours was out.
During the 8 step level it would get to Step 5 (which was the Front of the build plate) and fail and return to trying Step 2. After it went in a loop a few times it failed saying: “Tilt align failed” (or “Tiltalign failed”)
We fixed it with a great deal of help from the Cubicon re-seller. I’m detailing the steps here to help anyone else in this position:
- During the 8 step process, write down the “z-axis” measurements it gets to at each point.
- Ours were:
- Left: -0.24mm
- Right: 0.19mm
- Back: 0.11mm
- Front: 0.09mm
- From these measurements we find that Right needed to be adjusted down and the Front needed to be adjusted up (this makes sense as left and right are related and front and back)
- Next remove the build plate:
- unplug the green plug at the back of the build plate
- cut the cable tie holding the green plate in place and unhook the cables
- remove the build plate by holding the back right corner and pulling up hard – note it is magnetic and requires a hefty pull
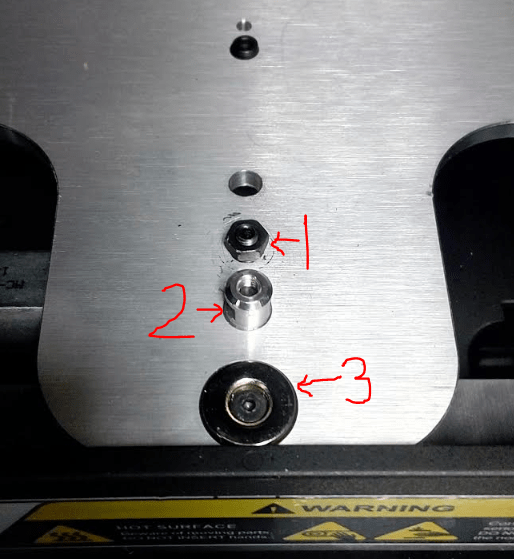
- Under the build plate now, locate the screws, see picture below – everything happens in #1.
- First use a spanner to loosen the nut (in our case in the Right and Front positions)
- Use a small allen key inside the nut you just loosened and adjust up or down
[su_spacer size=”40″]
