Have a Polar Enabled 3D printer? Printing your designs has become even easier with Polar Enabled 3D printers.
If you are a part of the GE Additive Education Program then you definitely have a Polar Enabled 3D printer and you can take advantage of the integration between Makers Empire and Polar Cloud, giving you a seamless experience from design to print.
Here are a few steps to help you make the most of using Makers Empire & Polar Cloud in your classroom…

1. Connect your printer to the Polar Cloud.
Each Polar Enabled 3D printer will have slightly different methods for getting hooked up to the Polar Cloud – but each of them requires wifi or an ethernet cable as the Polar Cloud is an internet-based platform.
For the GE Additive Education Program, your school would have received either a Dremel 3D45 or a FlashForge Inventor IIS.
Instructions for connecting those printers can be found below:
For Dremel
2. Link your Makers Empire and Polar Cloud accounts.
Once your printer is connected to the Polar Cloud, now you need to connect your Makers Empire account to the Polar Cloud too.
This is very simple and can be done by logging into the Teacher’s Dashboard, clicking on the settings icon and then clicking the ‘Details’ button in the Polar Cloud section.
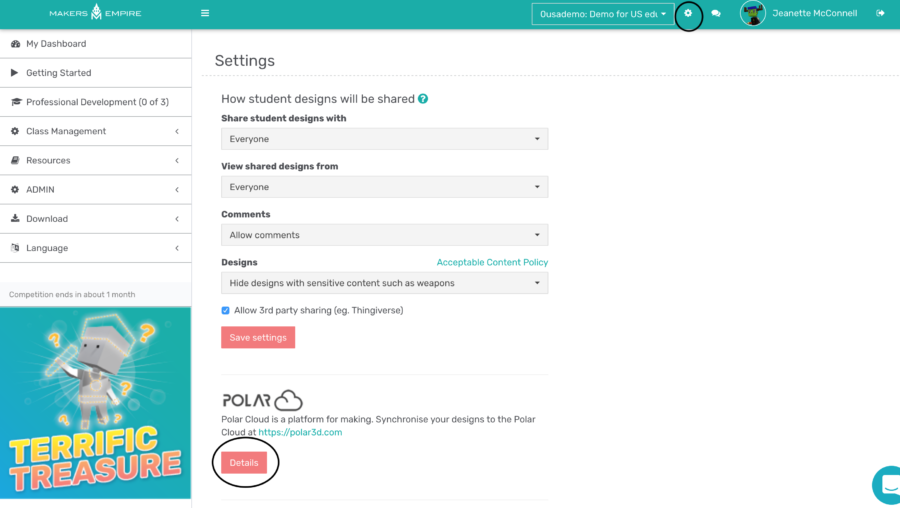
You will be prompted to sign in to your Polar Cloud account and then click, accept and approve the connection.
Once that’s done you will be able to send your Makers Empire designs right to the Polar Cloud where that can then be printed!
3. Printing a Makers Empire design via the Polar Cloud.
Once you have linked you Makers Empire and Polar Cloud accounts, it’s time to get printing!
In the Teacher’s Dashboard, navigate to the student’s design that you want to print. Click on the downward facing arrow and select ‘Send to Polar Cloud’.
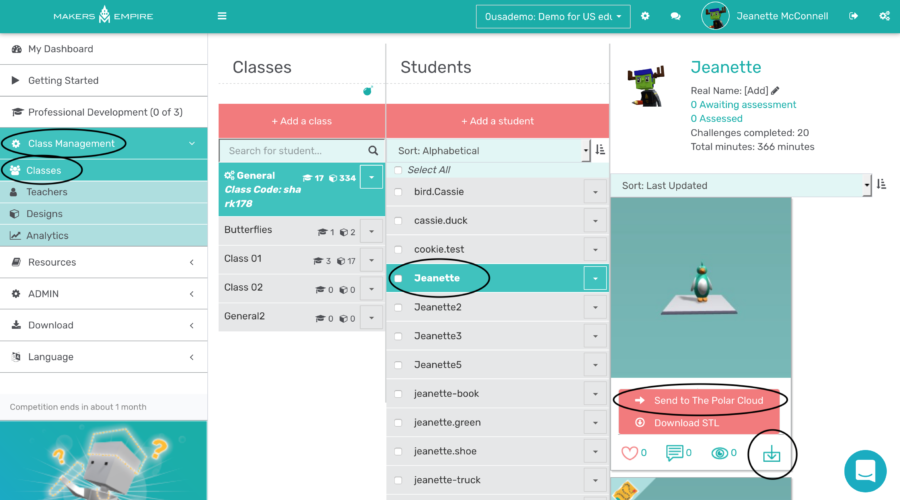
Then you can select ‘View in Polar’ and you will be able to print your design from the Polar Cloud to the printer you previously connected!
4. Printing from the Polar Cloud.
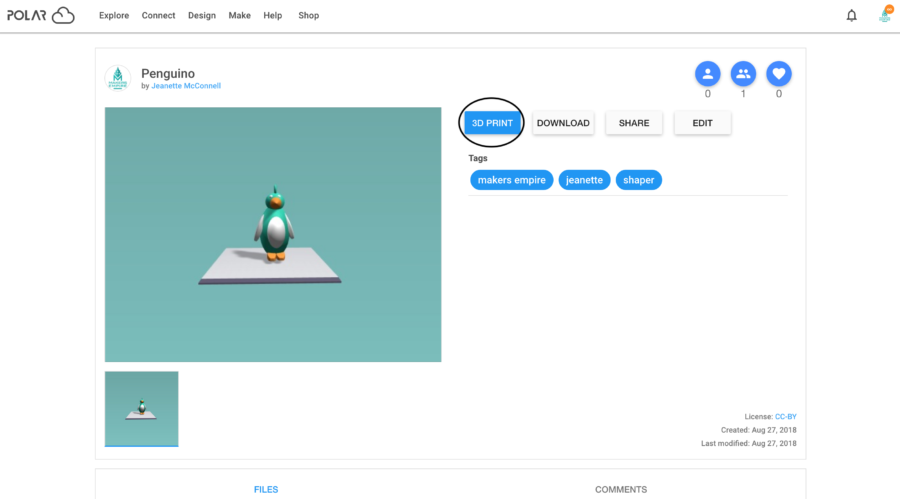
Once your design is loaded into the Polar Cloud you are ready to send the design to your Printer.
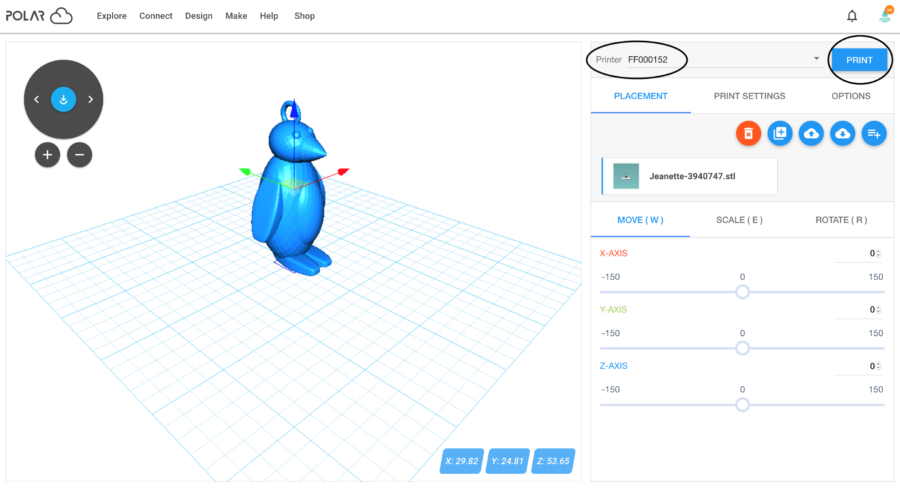
After you click ‘View in Polar’ you will be taken to the page below, where you can print, share or download your design.
Click on the ‘3D Print’ button.
Once you click 3D Print you will need to click the ‘Send Job’ button underneath the My Printer option.
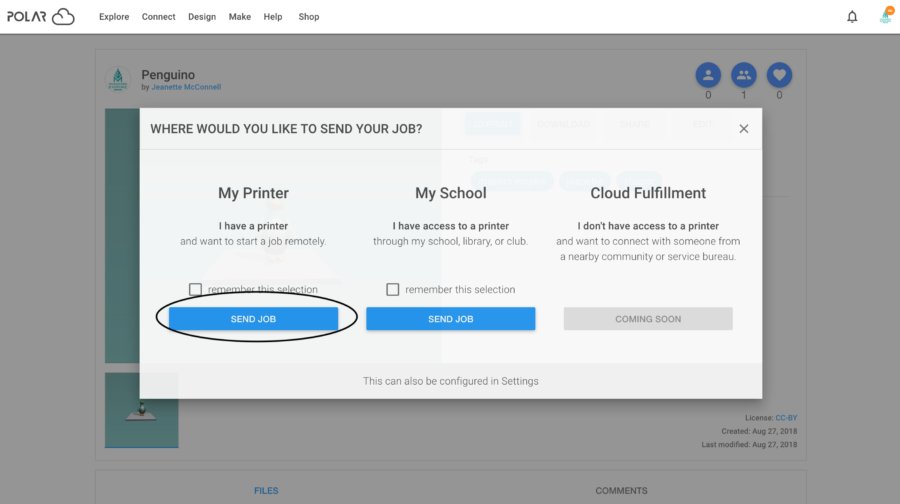
Once you have done that you will be taken to a page where your design appears on the virtual build plate. Here you can make final adjustments to your design and print settings.
Once you are happy with the setup, make sure your correct printer is selected and click print!
Combing the power of Makers Empire and the Polar Cloud is a great way to make using 3D technology in your classroom even easier.
About the Author
Jeanette McConnell, Ph.D. is a passionate educator with a strong scientific background. She earned a bachelors degree in biochemistry at San Diego State University and went on to earn a doctoral degree in chemistry at the University of NSW. Throughout her studies, she tutored her fellow students. Her experience presenting science shows and workshops to children convinced her of the value of a hands-on education. She believes Makers Empire is the way to make learning hands-on and harness the power of 3D printing technology in education.
