This article will walk you through the process of unboxing and setting up your FlashForge Inventor IIS 3D printer bought from Makers Empire so it is ready for printing.
Please read each step fully before viewing the photos and animations that accompany them.
[su_spacer size=”40″]
What you will need:
- Scissors and/or side cutters
[su_spacer size=”40″]
Step 1:
Cut open the box, and remove the Quick Reference Guide, and the two cardboard boxes. NOTE: The Quick Reference Guide can be pinned to the wall next to the printer.
[su_row][su_column size=”1/2″ center=”no” class=””] [/su_column] [su_column size=”1/2″ center=”no” class=””]
 [/su_column][/su_row]
[su_row][su_column size=”1/2″ center=”no” class=””] [/su_column] [su_column size=”1/2″ center=”no” class=””]
 [/su_column][/su_row]
[su_spacer size=”40″]
Step 2:
Reaching into the side of the box, you should feel a set of handles on the styrofoam pieces. You can use these to lift the printer out of the cardboard box. Note: The roll of filament included with the printer is kept at the bottom of the box.
[su_row][su_column size=”1/2″ center=”no” class=””]  [/su_column] [su_column size=”1/2″ center=”no” class=””]
 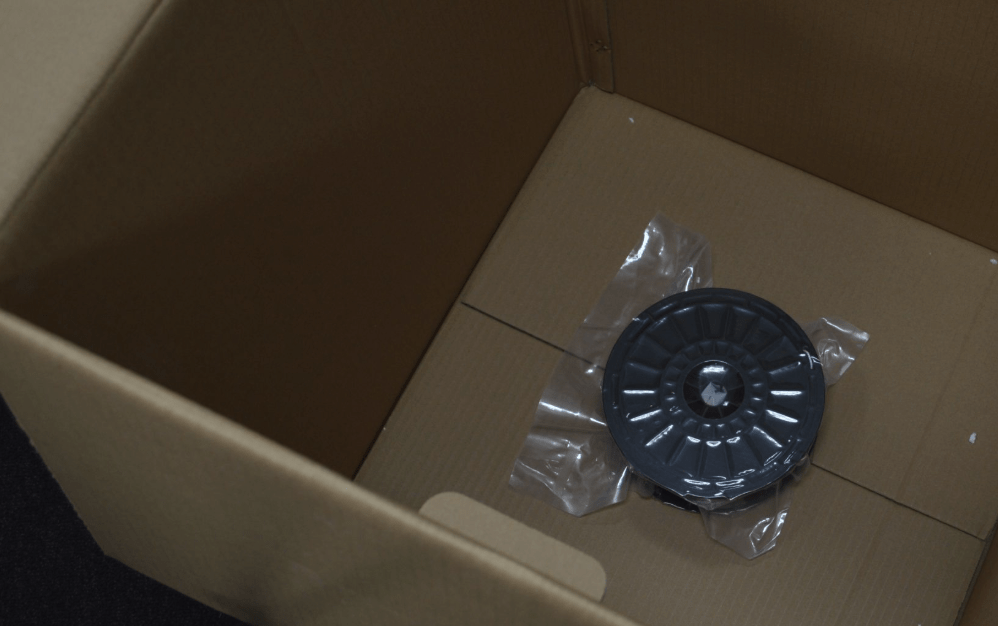 [/su_column][/su_row]
[su_spacer size=”40″]
Step 3:
Next, slide the styrofoam chunks off from each side. You can then also take the plastic bag off which is secured with three pieces of tape.
[su_row][su_column size=”1/2″ center=”no” class=””]  [/su_column] [su_column size=”1/2″ center=”no” class=””]
 [/su_column][/su_row]
[su_spacer size=”40″]
Step 4:
After moving the Inventor IIS onto a table, lift the large piece of styrofoam vertically out from the top of the printer, and open the door on the front of the printer.
[su_row][su_column size=”1/2″ center=”no” class=””]  [/su_column] [su_column size=”1/2″ center=”no” class=””]
  [/su_column][/su_row]
[su_spacer size=”40″]
Step 5:
Looking inside from the front, you can now remove the lid of the printer by sliding it forward. Note: this can be a tight fit, so you may need to wiggle it out a bit.

[su_spacer size=”40″]
Step 6:
You can now remove the small piece of styrofoam from the left-hand side.

[su_spacer size=”40″]
Step 7:
To remove the final piece of styrofoam, you’ll need to lift the platform up by hand. This will be stiff at first, but keep applying pressure and you will feel it start moving upwards. You can then slide out the last piece of styrofoam.

To continue reading this article, head over to the full article in the Makers Empire KnowledgeBase.
After setting up your printer, you’ll need to install the appropriate printer software to send your first print.
[su_spacer size=”40″]
AUTHOR BIOGRAPHY
[su_spacer size=”40″]
[su_divider top=”no” divider_color=”#cfd3d3″ size=”1″ margin=”30″]
